domain? Or you just have two domains that you are finding difficult to manage. Office 365 allows you to add multiple domains under one tenant, in this guide I will show you how to add multiple custom domains in Office 365.
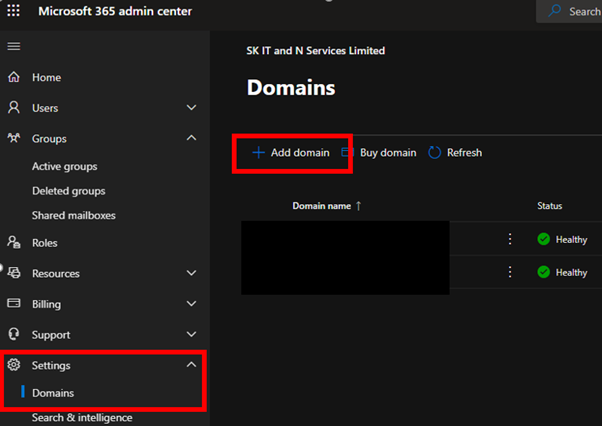
First, log in to https://admin.microsoft.com/ with a global admin account and click on Settings > Domain > Add Domain.
On the next page Enter the domain address and click Use this Domain.

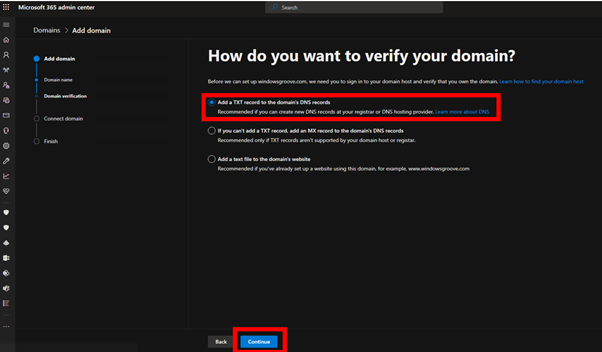
Next, you need to choose an option to verify the ownership of the domain. I will go with the first option which lets you add the TXT record and click Continue.
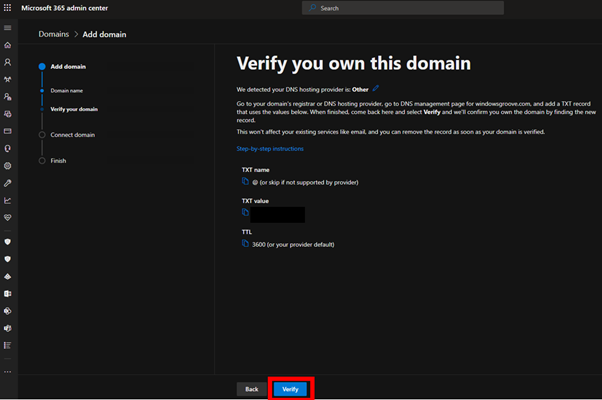
On the next page, Office 365 will show you the TXT value that is required within your DNS records. So go ahead and log in to your domain registrar’s and add this TXT record. Once you added the record wait for few minutes and click “Verify”
If Microsoft can verify your domain, the below page will load just click Next to get DNS entries for Emails.
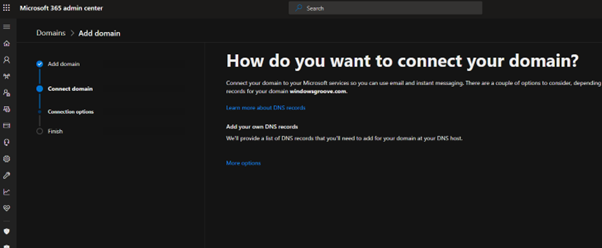
On Add DNS records page you will have MX Records, CNAME Records and TXT Records listed for your domain. You need to expand email record and add them into your DNS records, once done wait a few minutes and click Continue.

Updating DNS could take some time so you may get an error message saying the record is missing just wait for few more minutes and try again.
If all goes well, you will get the below screen.

Click Done, and now you will see the newly added domain under Settings > Domains. (repeat the process for all the other domains you have.)
Now, to receive emails for this new domain, go to Active users under Users and add aliases for your mailboxes.
Click on a user’s name.
From the right-hand panel under Aliases click on Manage Username and Email.
Under Aliases enter the username this could be the same as your current username.
Under Domains dropdown, select the newly added domain and click Add.
Repeat the process for all the other mailboxes.
If you have few mailboxes, then adding them manually would be the best option but if you are working with more than 10 mailboxes use PowerShell to add aliases.
Unfortunately, you cannot create a new user with the same name or even an email address. If you already have a user with the email address of Example@test1.com you cannot create another user with the same name or email address Example@test2.com. The username for the new mailbox must be unique across your all domains.
The other thing to note here is that if you have cache mode on for Outlook you may get an error message saying you do not have permission to send email using this account. I disabled the cache mode and restarted Outlook seems to have fixed the issue.